Sunday, November 12, 2023

Another Quilt Idea?

I had mentioned about the Tahoe quilt in an earlier post.  Since the Tahoe Quilt Along is currently going on, I'm watching the progress of that quilt, on-line.  I've told myself that I'm not going to start on another quilt before I finish one of my UFOs first.  But, what about a mini quilt?  Could I count that as a "regular" quilt?  In my mind, I say "Nope!"  And that starts a new process of exploring different ways of creating a miniature Tahoe quilt.

In her Tahoe Quilt Along YouTube videos, Edyta Sitar posts one diamond block each day, for 24 weeks.  She is currently on block #14.  I've been watching the videos daily, for the last 14 days, 2 weeks of being teased with this quilt!!  I hate to admit it, but I really want to join in!


I had to sit down and draw up some ideas.  The Tahoe Quilt is made up of 1-inch diamonds.  I'd like to make mine with 3/8-inch diamonds.  It would make less than half the size.  It should be approximately 30 x 30 inches, compared to the original 84 1/2 x 84 1/2 inches.  30 x 30 inches isn't a miniature quilt, but it is small. 


The small diamond, on the left, will be the size of my small diamond block.  The right is the original block size.

Until next time,

- - - - Jane - - - -

Farm Girl Vintage - Mama Hen Block


The next block is the Mama Hen block.  It was a simple lay-out with small triangle points used for the comb on top of its head.  Visually, it doesn't look much like a chicken.


Once the primary pieces are sewn together, it starts looking better.  Especially with the comb and beak.


Now, it looks like a chubby mama!


Here are a few blocks I had made, when I first started this quilt, a few years ago.  Baby Chick block and Egg Basket block are a few in the same chicken theme.


My quilt is slowly coming together.


As a side note:  another quilt by Lori Holt, designer of Farm Girl Vintage, is Chicken Salad quilt.


I really enjoy applique.  The curves of the chickens and roosters in this quilt are very interesting!
(images are from Lori Holt's blog, A Bee in my Bonnet)


Maybe I can see this quilt sometime in the future.

Until next time,

- - - -Jane - - - -

Thursday, November 9, 2023

Laundry Basket Quilts Addiction

I have gone through many phases in my quilting journey.  There was a time when I was really into Civil War quilts.  And another time I fell in love with the vintage look of Depression Era quilts, and I made a few of those.  And there was a time when all I wanted to make was miniature quilts.  Even though I love all quilts, my fondness of certain styles of quilts come and go. 

Currently, my enthusiasm is focused on Edyta Sitar of Laundry Basket Quilts. 


Within the last few years, I have started a few of her quilts, or collected her beautiful fabric for future quilts.  I've have a lonngggggg list of projects I want make with her designs.  On her website: Laundry Basket Quilts, Edyta usually has activities happening that draws me into another new project.  For example, her Tahoe Quilt Along.

The Tahoe Quilt Along is an activity that she is currently working on through Youtube. I'm enchanted by it's diamonds, and there are no Y-seams!  There are several options of this quilt, using her different fabric lines.  I'm loving her blue version.  I'll be writing more about this Tahoe quilt in a later post.  You can follow this quilt along by following her at Laundry Basket Quilts: Quilting Window on Youtube or you can check it out on her blog at her website.


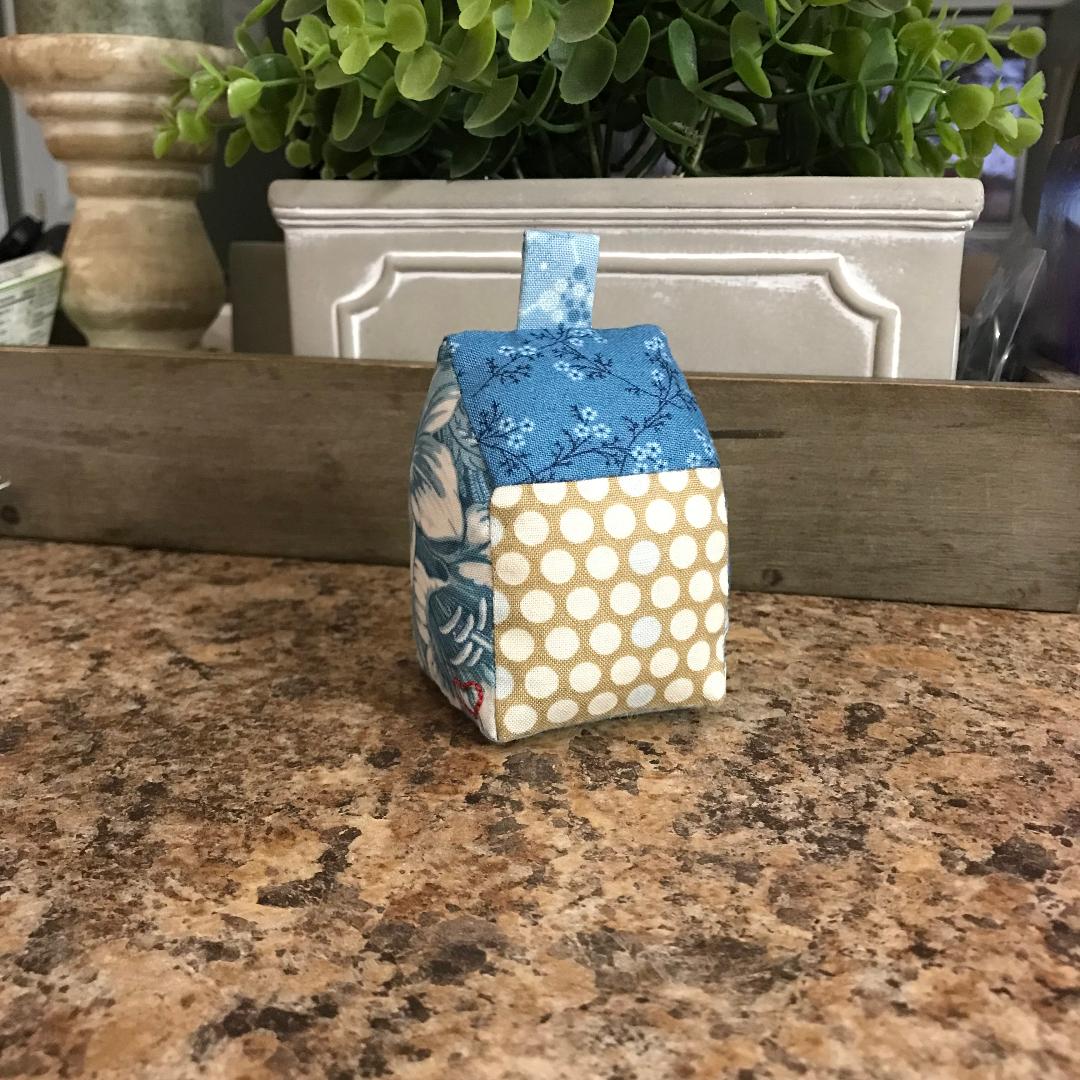
For the time being, I'm going to try to keep myself occupied with Edyta's smaller projects.  I had recently purchased her Little Beach House kit. It is a small house that can be used as a pincushion or it can be an ornament for a Christmas tree.


I loved the blue color themed fabrics that was included in the kit.  


The pieces were small and simple to sew together.  It didn't take much time to have it all together.  I'm thrilled with how it turned out!


Since it is filled with stuffing, it has a bit of a rounded appearance.  And I had an idea!  If I cut cardboard and line it inside the walls of the house, would it have a more structured appearance?


Can you tell a difference?


I also added a hand embroidered heart on the bottom corner of the house, just like Edyta's pincushion house!


Until next time,

- - - - Jane - - - -

Tuesday, November 7, 2023

Adding More to Farm Girl Vintage Quilt


The next block I choose to piece together is the Fresh Pears block.  It looks like a more complicated block, but it looks so much fun!  And I adore the little embroidered seeds on it (I'll be doing the hand embroidery at a later date). So cute! 


The stems were a little bit of a problem.  Once I had a few of the pieces sewn, and laid out, I had seen it wasn't centered to the top of the pears.  I had cut one of the pieces too wide.


Once those pieces were corrected, it fit perfectly.

Two blocks that I'm adding are the Patchwork Pumpkin block and Pie Cherries block.  


The pumpkin is a prime representation of the Fall season.  And Pie Cherries was the very first block that I finished.  

So far, I'm at 6 blocks.


Until next time,

- - - - Jane - - - - 

Tuesday, October 31, 2023

Working on My Farm Girl Vintage Quilt


Today is October 31.  Happy Halloween!!  I can't believe just how fast the year has flown by.  It will be winter and snowing before we know it.

A few years ago, I had knee surgery.  I had fallen in love with the Vintage Farm Girl quilt and I thought it was a good project to work on while I was recovering.  Working on a 6 inch x 6 inch block seemed easy enough.


Which block should I start with, this second time?  The first block that jumped out at me was the Scrappy Strawberry block. 


The funny thing is that I really don't know why.  I'm not a pink person, but I do like the small 1 inch blocks in it.

When I originally started this quilt, I purchased several of Lori Holt's fabric lines.  I tried to match the fabrics that I saw in the quilt.  I had about 9 pinks and 9 greens.


Once I started piecing, I started seeing the shades of pink that just didn't seem to jive next to each other, in my opinion.  I moved some of the pieces around.


And then, I realized that it really didn't make much of a difference!  I'm happy with how my block turned out.


I'm adding two additional blocks that I had finished prior to today - the Farmhouse block and the Pinwheels block.


Until next time,

- - - - Jane - - - -

Let's Try This Again!


I apologize again!  It's been a while!

The last post was September 2020.  Since then, we had purchased a new house, and then I had some health issues come up.  Even though my health issues aren't completely resolved yet, I'm feeling much better than I have been. With my renewed energy, I'm going to restart my quilting blog.

I've been wanting to start this again, since me and my husband has become empty nesters (the youngest child is now in college).  With the extra time on hand, I thought this would be a good idea to manage all the different projects I have and share them once they're completed!

Since we have moved into our new home, I've acquired a sewing room!!  I've always had my sewing area sprawled the coffee table, for everyone to see. Depending on what project I was working, it was hard to hide.  Now, I'm able to close the door when my room gets too crazy!

As I have been unloading the boxes, I've come across a lot of UFO's. I will make an attempt to finish those quilt tops and, eventually, get them quilted.  So, I may seem as if I'm jumping from project to project at times.  I get very distracted, and I'll turn my attention to another project once it gets complicated or monotonous.  

So, here we go again!

- - - - Jane - - - -

Sunday, September 6, 2020

Wee Little Blocks


I had started this hand-pieced project some years ago, when my boys were still pretty young.  It was the first year that my youngest son was tall enough to ride the big roller coasters at the major theme park. He was able to ride with his older brother and his Dad.  Me, on the other hand, was unable to ride on the coasters.  I had to sit aside and wait 1 to 2 hours for them to stand in line for these coasters. I had this project while I was waiting for them. 

Each block measures at a finished 3/4 inch.  The blocks consisted of nine-patches and a blocks made up with a 1/4 inch square surrounded with another 1/4 inch border (confusing? I didn’t know the name of this block).


Once I was done with it, it measured at 8 inches square with 845 pieces of tiny pieces of fabric hand-sewn together. 

Each time I spotted this piece, I’ve always wanted to do more to it. I felt it just wasn’t finished yet.  And the fabrics that I used in it, the first issue of Bear Essentials, by P&B Fabrics, are out of stock and impossible to find. I had to do a deep search in my stash to find the remaining fabrics that I had.  I would like to add another row around this mini-quilt and then add some borders. 


Maybe once it’s finished, for a second time, it could possibly be 12-13 inches square. I could add a sleeve to the back and, perhaps, hang it up in my future sewing room.  

Until next time,

- - - - Jane - - - -